Nail Art: Gold, White and Black Leopard Print

gold white black leopard nail art.png

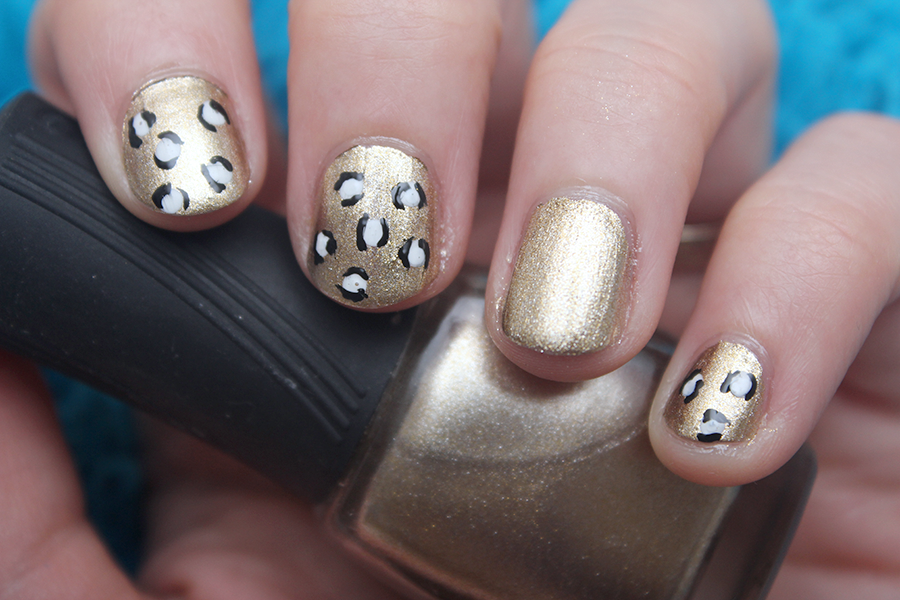
This nail art is actually from last summer. I actually haven't been using any nail polish lately. When I'm pregnant I'm always very (probably-way-too-much) careful about absolutely everything...and I'm not too sure about those nail polish fumes! To think that not so long ago I didn't use nail polish at all, and now...I miss it! Not like I wore it every day, but still, I really enjoyed these little nail art projects of mine. Anyway, here's my version of a quick and easy gold, white and black leopard print nail art. Enjoy!

Materials

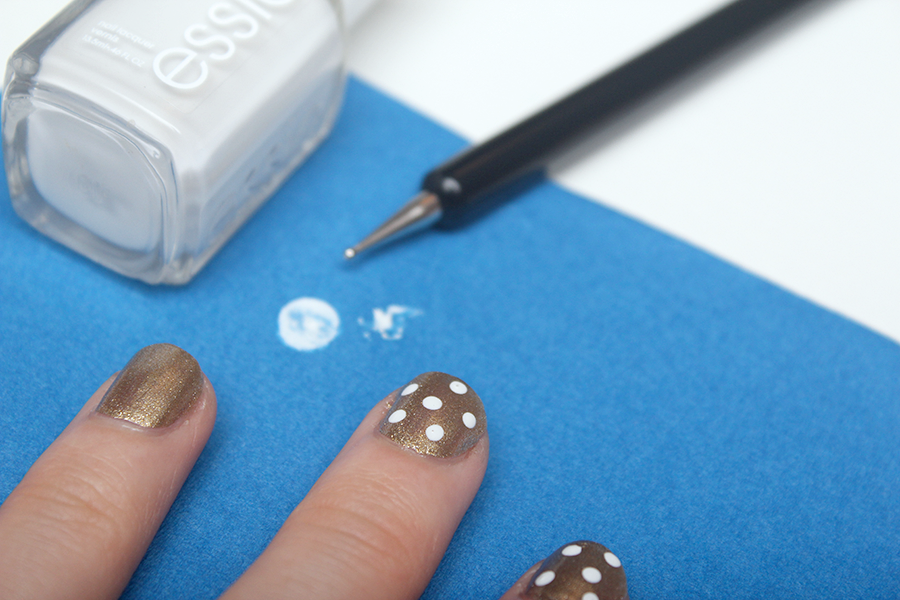
Blanc nail polish by Essie
Gold nail polish by ORLY
Black nail polish by Revlon (I used the black end of Moon Candy Nail Art)
Dotting tool
Nail art paint brush

materials for leopard nail art.png

Steps

1. Apply a gold base. I used two coats.

2. Use the dotting tool (or tooth pick) to make random white dots on selected nails.

3. Use a nail art paint brush (or tooth pick) to make 2 black lines around each white dot.

gold nail polish.png
apply white dots to gold nails.png

...and done! Super easy. Don't forget to add a top coat, it increases durability. Wouldn't want to lose your art within a day now would you?

I really want to do a maternity outfit post. I've never really tried styling my belly before. I just kind of throw anything that fits on. Lol. I might challenge myself to do that so I can make a cute Blurb book of my style's evolution. Wouldn't that be cool?

gold leopard nail art.png

DIY: Homemade and Natural Lip Balm

homemade natural lip balm with coconut oil.png

Ever since I made my natural homemade moisturizing lotion, I've been wanting to make more and more of my own beauty products at home using natural ingredients. I am trying to minimize all the unnecessary chemicals in my family's life. I've been using this recipe for about a year now and I'm very satisfied with it. It goes on smooth, doesn't smell like anything (unless you add essential oil) and absorbs super quickly. Most important of all, it moisturizes very well.

Ingredients

1 tbsp Coconut Oil
1.5 tbsp Beeswax

Optional

Drop of Essential Oil (I used peppermint)
Drop of Vitamin E (acts as preservative for large batches)

ingredients for homemade lipbalm beeswax and coconut oil.png
peppermint essential oil and vitamin e.png

Steps

1. Combine Coconut Oil with the Beeswax. Microwave until melted.

There are many kinds of Coconut Oils; some are harder than others at room temperature. Because of this, the first time you make this recipe, I suggest starting with small portions and only melting a bit of the Beeswax at a time (melt, allow to harden for a few hours, test with finger, then add more if necessary). I strongly suggest you do this because there is nothing more annoying than a lip balm that's hard as rock! Once you've figured out the exact proportions, you don't need to do this again.

2. Pour in container, let sit until set.

coconut oil and beeswax.png
melted beeswax and coconut oil.png

Do you have any natural homemade recipes? By the way… you could also add any other oil you like. Just use the same oil/beeswax ratio and do the hardness test. c:

easy homemade lipbalm.png

Disclaimer: This recipe is homemade. I am not a health professional, I am simply a mother trying to find simple and chemical-free solutions for my family. This lip balm works great for us but it may not work for you and I take no responsibility for that.

Disclosure: This post contains affiliate links. I will be compensated if you make a purchase after clicking them.

Mosaiculture at the Montreal Botanical Gardens

blue and yellow flowers.JPG
heart shaped pink flowers at garden.jpg
daisy flowers.JPG
bee on purple flower.JPG

The summer is almost over and although I'm excited for fall & winter, I really don't feel like we HAD a summer. It rained most of the time, and on the few days the sun came out, there were so many mosquitoes that going outside really wasn't pleasant. We did manage to cross off a few activities from our summer bucket list though, which made me pretty happy.

mother nature mosaiculture botanical garden montreal.JPG

I absolutely adore the outdoors, gardening, and flowers. This year, my husband took us to the Montreal botanical gardens. They had an amazing international mosaiculture exhibition; it was breathtaking. The above picture was my favorite mosaic. It's a 15 meter tall representation of mother earth. The amount of work that goes into planning, building, growing and maintaining the plants is unthinkable.

During our trip, I practiced my macro photography skills. I must admit that after experiencing the full reach of manual photography, I just can't go back to point and shoot. One of my future projects is writing down everything I learned. Have you tried manual photography on a DSLR camera? Do you like it?

horticultural art.JPG

This exposition is the world's most prestigious competition of horticultural art and it's not hard to see why, just look at the details in the above mosaic: the fingers, the clothing and the hair. Making it is something, keeping it looking like this is something else.

200 experts from Canada, Belgium, China, South Korea, Spain, USA, France, Japan, Mexico, Turkey and across Africa created over 40 plant-life sculptures, some big enough to walk through. This year's theme was "land of hope" focused on biodiversity; the artists also portrayed their nationality and culture.

succulent chameleon.jpg

This chameleon is built entirely with succulents. Isn't it amazing what you can do with plants? I never would have thought you could make sculptures with them. Some people are so creative it blows my mind.

I'm so glad we were able to see this exhibition. I don't think my son will remember seeing these amazing mosaics but I'm sure it will return to Montreal in the future. We will definitely go again. Have you ever seen any mosaicultures? Do you like gardening?